
Ever wondered how you can play an online game with friends or access your home network remotely without a hitch? It’s all thanks to a nifty trick called port forwarding. Port forwarding is the unsung hero that lets specific traffic in and out of your network, ensuring seamless communication between devices. But how do you know it’s working correctly? That’s where the magic of testing comes in. Today, we’re diving deep into how to test if port forwarding works on my router and why it matters.

Preparing to Test Port Forwarding
Before we plunge into testing, it’s crucial to set the stage. Think of it like preparing your ingredients before cooking; you wouldn’t want to start without knowing everything’s in order.
Ensure Correct Router Setup
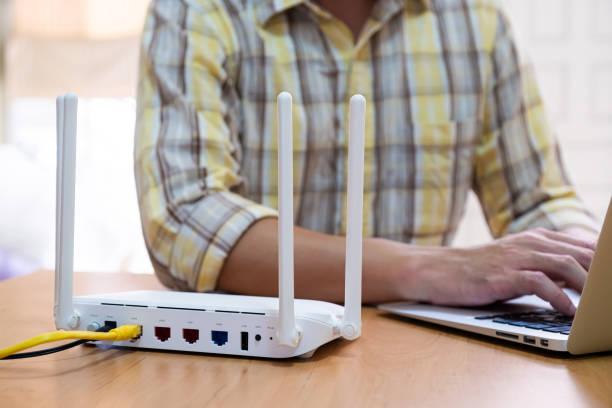
To begin, let’s talk about your router—the gateway that connects your internal network to the vast internet world. It’s where the port forwarding magic happens, but only if everything is set up correctly.
First off, can you access your router settings? It’s like having the keys to your castle—without them, there’s not much you can do. Typically, you’d log in via a web browser by typing your router’s IP address (commonly something like 192.168.1.1 or 192.168.0.1) into the address bar. If you’ve never done this before, your router’s manual or a quick online search can guide you.
Once inside, you’ll find a world of settings at your fingertips, including the all-important port forwarding rules. Double-check that your login credentials are secure—an open router is a hacker’s playground.
Next up is the static IP address. Imagine your devices are guests at a party, and the router is the host. A static IP address ensures each guest has a reserved seat at the table, meaning they’ll always be found in the same spot, avoiding any mix-ups. When you set up port forwarding, you’re telling your router to direct certain traffic to a specific device. If that device’s IP address changes (as can happen with dynamic IPs), your port forwarding rules could break. Assigning a static IP to devices that need port forwarding is a crucial step in the preparation.
Understanding Port Numbers and Their Uses
Before you can test anything, you need to understand what you’re testing. Ports are like doors on a house—each one allows different types of traffic to enter and exit.
There are 65,535 ports available, but don’t worry—you don’t need to know them all. A few key ones will suffice. For example:
Port 80:
The most famous, used by HTTP to serve websites.
Port 443:
For secure HTTPS traffic, where your sensitive data travels.
Port 21:
Used for FTP, allowing you to upload and download files to a server.
Port 25:
Handles SMTP, which is essential for sending emails.
Each port has a specific purpose, and some are more vulnerable than others. Understanding which ports you need to open, and why, is half the battle in port forwarding.
Tools and Methods for Testing Port Forwarding
With the groundwork laid, it’s time to roll up our sleeves and test if those ports are indeed open and ready for action.
Using Online Port Checker Tools
The easiest and quickest way to check if your port forwarding is working is by using an online port checker. These tools are like a security guard at a door—they test whether the port you’ve opened can be accessed from the outside world.
An online port checker sends a request to your specified port. If the port is open, the tool receives a response, indicating success. If it’s closed or blocked, the tool will let you know that, too. This method is particularly useful because it tests the port’s accessibility from an external perspective, just like a remote user would.
There are several reliable websites you can use for this task:
CanYouSeeMe.org: A simple and effective tool for checking whether your ports are open.
Ping.eu: Offers a port checker along with several other networking tools.
YouGetSignal.com: Another easy-to-use site that can verify open ports.
Each of these sites operates similarly—input your port number, hit check, and let the site do the rest.
Manual Testing Using Command Line
For those who prefer a more hands-on approach, or perhaps feel nostalgic for the command line, manual testing is a powerful option.
Here’s how you can manually check if a port is open using the command line, broken down by operating system:
Windows:
1. Open Command Prompt (you can search for `cmd` in the Start menu).
2. Type the command: `netstat -an | find “PORT_NUMBER”` (replace `PORT_NUMBER` with the port you want to check).
3. If the port is open, you should see a line indicating it’s listening, something like `0.0.0.0:PORT_NUMBER`.
Mac:
1. Open Terminal (found in Applications > Utilities).
2. Type: `sudo lsof -i :PORT_NUMBER` and press Enter.
3. If a process is using the port, it will be displayed. Otherwise, the port might not be open.
Linux:
1. Open Terminal.
2. Use the command: `netstat -tuln | grep :PORT_NUMBER`.
3. If the port is open, it will show up in the list.
This method is more technical but gives you a deeper understanding of how ports function within your operating system.
Interpreting the Results
Once you’ve run your tests, you’ll have some results to interpret. What does it mean if a port is open, closed, or filtered?
Open Port: If your test shows an open port, congratulations! It means that traffic can successfully reach the port and be forwarded to your intended device. This is what you want when port forwarding is configured correctly.
Closed Port: A closed port indicates that the port is not accessible, either because it’s not listening for traffic or because it’s blocked by the router or a firewall.
Filtered Port: If a port is filtered, it means that the traffic is being blocked or dropped, possibly by a firewall or security rule. This could be a sign that additional configuration is needed.
Understanding these results is key to knowing whether your port forwarding is working as intended or if further action is needed.
Troubleshooting Common Issues
Even the best-laid plans can hit a snag. If your port forwarding test didn’t go as expected, don’t worry—troubleshooting is part of the process.
Adjusting Router Settings
Often, the issue lies in the router settings. Maybe a port forwarding rule wasn’t set correctly, or the wrong IP address was targeted.
Steps to Modify Port Forwarding Rules and Ensure Correct IP Targeting
1. Double-Check Your Rules: Go back into your router’s port forwarding settings and verify that the correct port number and IP address are entered. Ensure that the protocol (TCP, UDP, or both) is correct.
2. Verify the IP Address: Remember the importance of a static IP address? Make sure the IP you’re targeting is indeed static and matches the device you’re trying to forward traffic to.
3. Restart the Router: Sometimes, a simple reboot of the router can apply the changes and fix any lingering issues.
Dealing with ISP Restrictions
In some cases, your Internet Service Provider (ISP) may block certain ports, like HTTP (Port 80) or SMTP (Port 25), to prevent abuse. This can be a frustrating obstacle.
How to Bypass ISP Blocks on Common Ports
Use Alternate Ports: Instead of using the blocked port, configure your services to use a different, less commonly blocked port.
VPN or Proxy: A Virtual Private Network (VPN) can mask your traffic, allowing you to bypass ISP restrictions. However, this method can introduce latency and isn’t foolproof.
Contact Your ISP: Sometimes, simply asking your ISP to unblock a port (especially if you need it for legitimate reasons) can solve the problem.
Tips for Enhancing Security While Using Port Forwarding
Port forwarding, while incredibly useful, does open a door to your network. Like any open door, it’s essential to ensure it doesn’t let in unwanted guests.
1. Use Strong Passwords: For any service you’re exposing via port forwarding, ensure that it’s protected by a strong, unique password.
2. Update Regularly: Keep your router’s firmware and the software on the forwarded device up to date. This helps protect against vulnerabilities.
3. Limit Exposure: Only forward the ports that are absolutely necessary. If a service doesn’t need to be accessible from the internet, don’t open a port for it.
4. Monitor Activity: Regularly check your router’s logs to monitor for any unusual activity on your forwarded ports.
By following these best practices, you can enjoy the benefits of port forwarding while minimizing potential risks.
Conclusion
Testing port forwarding is not just a technical task; it’s an essential practice for anyone looking to maintain a robust and secure network. Knowing how to test if port forwarding works on my router ensures that your setup is functioning as intended, allowing for seamless connectivity while keeping your network safe. Remember, preparation is key, testing is crucial, and troubleshooting is just part of the process. Happy port forwarding!
FAQs
What is port forwarding and why do I need it?
Port forwarding is a technique that directs external traffic from a specific port to an internal device on your network, enabling access to services like gaming or remote desktops. It’s needed to make internal network services accessible from the outside.
How do I know if my router supports port forwarding?
To check if your router supports port forwarding, log in to your router’s settings through a web browser. Look for options like “Port Forwarding,” “Virtual Server,” or “NAT” in the configuration menu.
Can opening ports affect my network security?
Opening ports can expose your network to external threats, as it creates potential entry points for hackers. Only open necessary ports and ensure your network has robust security measures like firewalls and updated software.
What should I do if no ports are showing as open when tested?
If no ports are showing as open when tested, ensure you’ve configured port forwarding correctly in the router, check firewall settings on your devices, and verify that the service is running and listening on the correct port.